
KOMBUCHA

Ingredients needed:
1 cup white sugar (preferably Organic cane sugar)
2 Tbsps Green Tea (or black or white)—or 8 tea bags
1 SCOBY and starter kombucha liquid
Water (unchlorinated)
Fruit tea (we like Celestial Seasonings) or fruit pieces for 2nd ferment (optional)
You’ll need a glass gallon jar and a piece of thin cotton cloth (not cheesecloth) or a paper towel
A SCOBY?? WHAT IS THAT?
It stands for a “Symbiotic Culture of Bacteria and Yeast”. It multiplies. It grows. It creates stringy, strange looking things in the tea. It looks a little scary. My brother won’t allow one in his house….
But this slightly gross, slimy yet firm, ah, thing is a wonderful mass of bacteria and yeast that somehow turns your tea and sugar into a healthy, fizzy, fermented, refreshing drink that’s loaded with antioxidants, B vitamins, and probiotics!
WHAT DO I NEED TO GET STARTED?
Most importantly, you’ll need a SCOBY baby of your own and a bit of kombucha as a starter. Think of the starter liquid as your activator, the bacteria-packed potion that kick-starts your kombucha into full swing. I’d be happy to share one with you for a free-will donation!!

HOW TO MAKE KOMBUCHA TEA:
Bring 4 cups of water to a boil in your teapot or a kettle.
I like to use a quart jar for this next step. Add the 1 cup of sugar and the 2 Tbsp. of tea to the jar, then VERY slowly pour the boiling water into the jar (slowly so as not to crack the jar), filling it to the top. Stir well, then put a lid on the jar and let your sweet tea steep for about an hour or until cool.
Transfer the tea, sugar, water blend to a gallon jar and fill to about 2 inches from the top with water (NOT chlorinated water).
Now put your SCOBY in the jar, along with the cup or so of kombucha liquid that came with your SCOBY.
Fill the jar the rest of the way up with water.
Cover the jar with a breathable cloth or paper towel and secure it with a rubber band or piece of string.
*A quick note on that there sugar: Yes, the finished kombucha contains a bit of sugar but not as much as you might think. The sugar feeds the SCOBY and is converted to vitamins and antioxidants so the finished Kombucha tea won’t have much sugar left in it.
Now you need to find the perfect place to put your kombucha jar while it does it’s thing. Kombucha thrives around 75 - 85 F degrees and prefers to be in a dark place. My kitchen tends to be on the dark side and the top of the refrigerator is a warm spot so that is where mine takes up it’s permanent residency. I’ve read that if the temp is too hot, the kombucha turns acidic and if it’s too cold, the healthy bacteria won’t thrive.
HOW LONG SHOULD I LET MY KOMBUCHA FERMENT?
That depends entirely on your tastebuds! :) Some people like it on the quite sweet side and prefer it after 7 days of “brewing”. Others let it go up to 20+ days for a decidedly more sour flavor. You can carefully stick a straw in along the side of your jar and take a taste if you’d like to know if it’s getting too strong for your preference. We like the longer version at our house (but not too long as then it tastes vinegary) and I keep 2 gallon jars going all the time to keep up with our demands. Even our little ones like Kombucha and it’s a fun thing to hear them try to pronounce it!
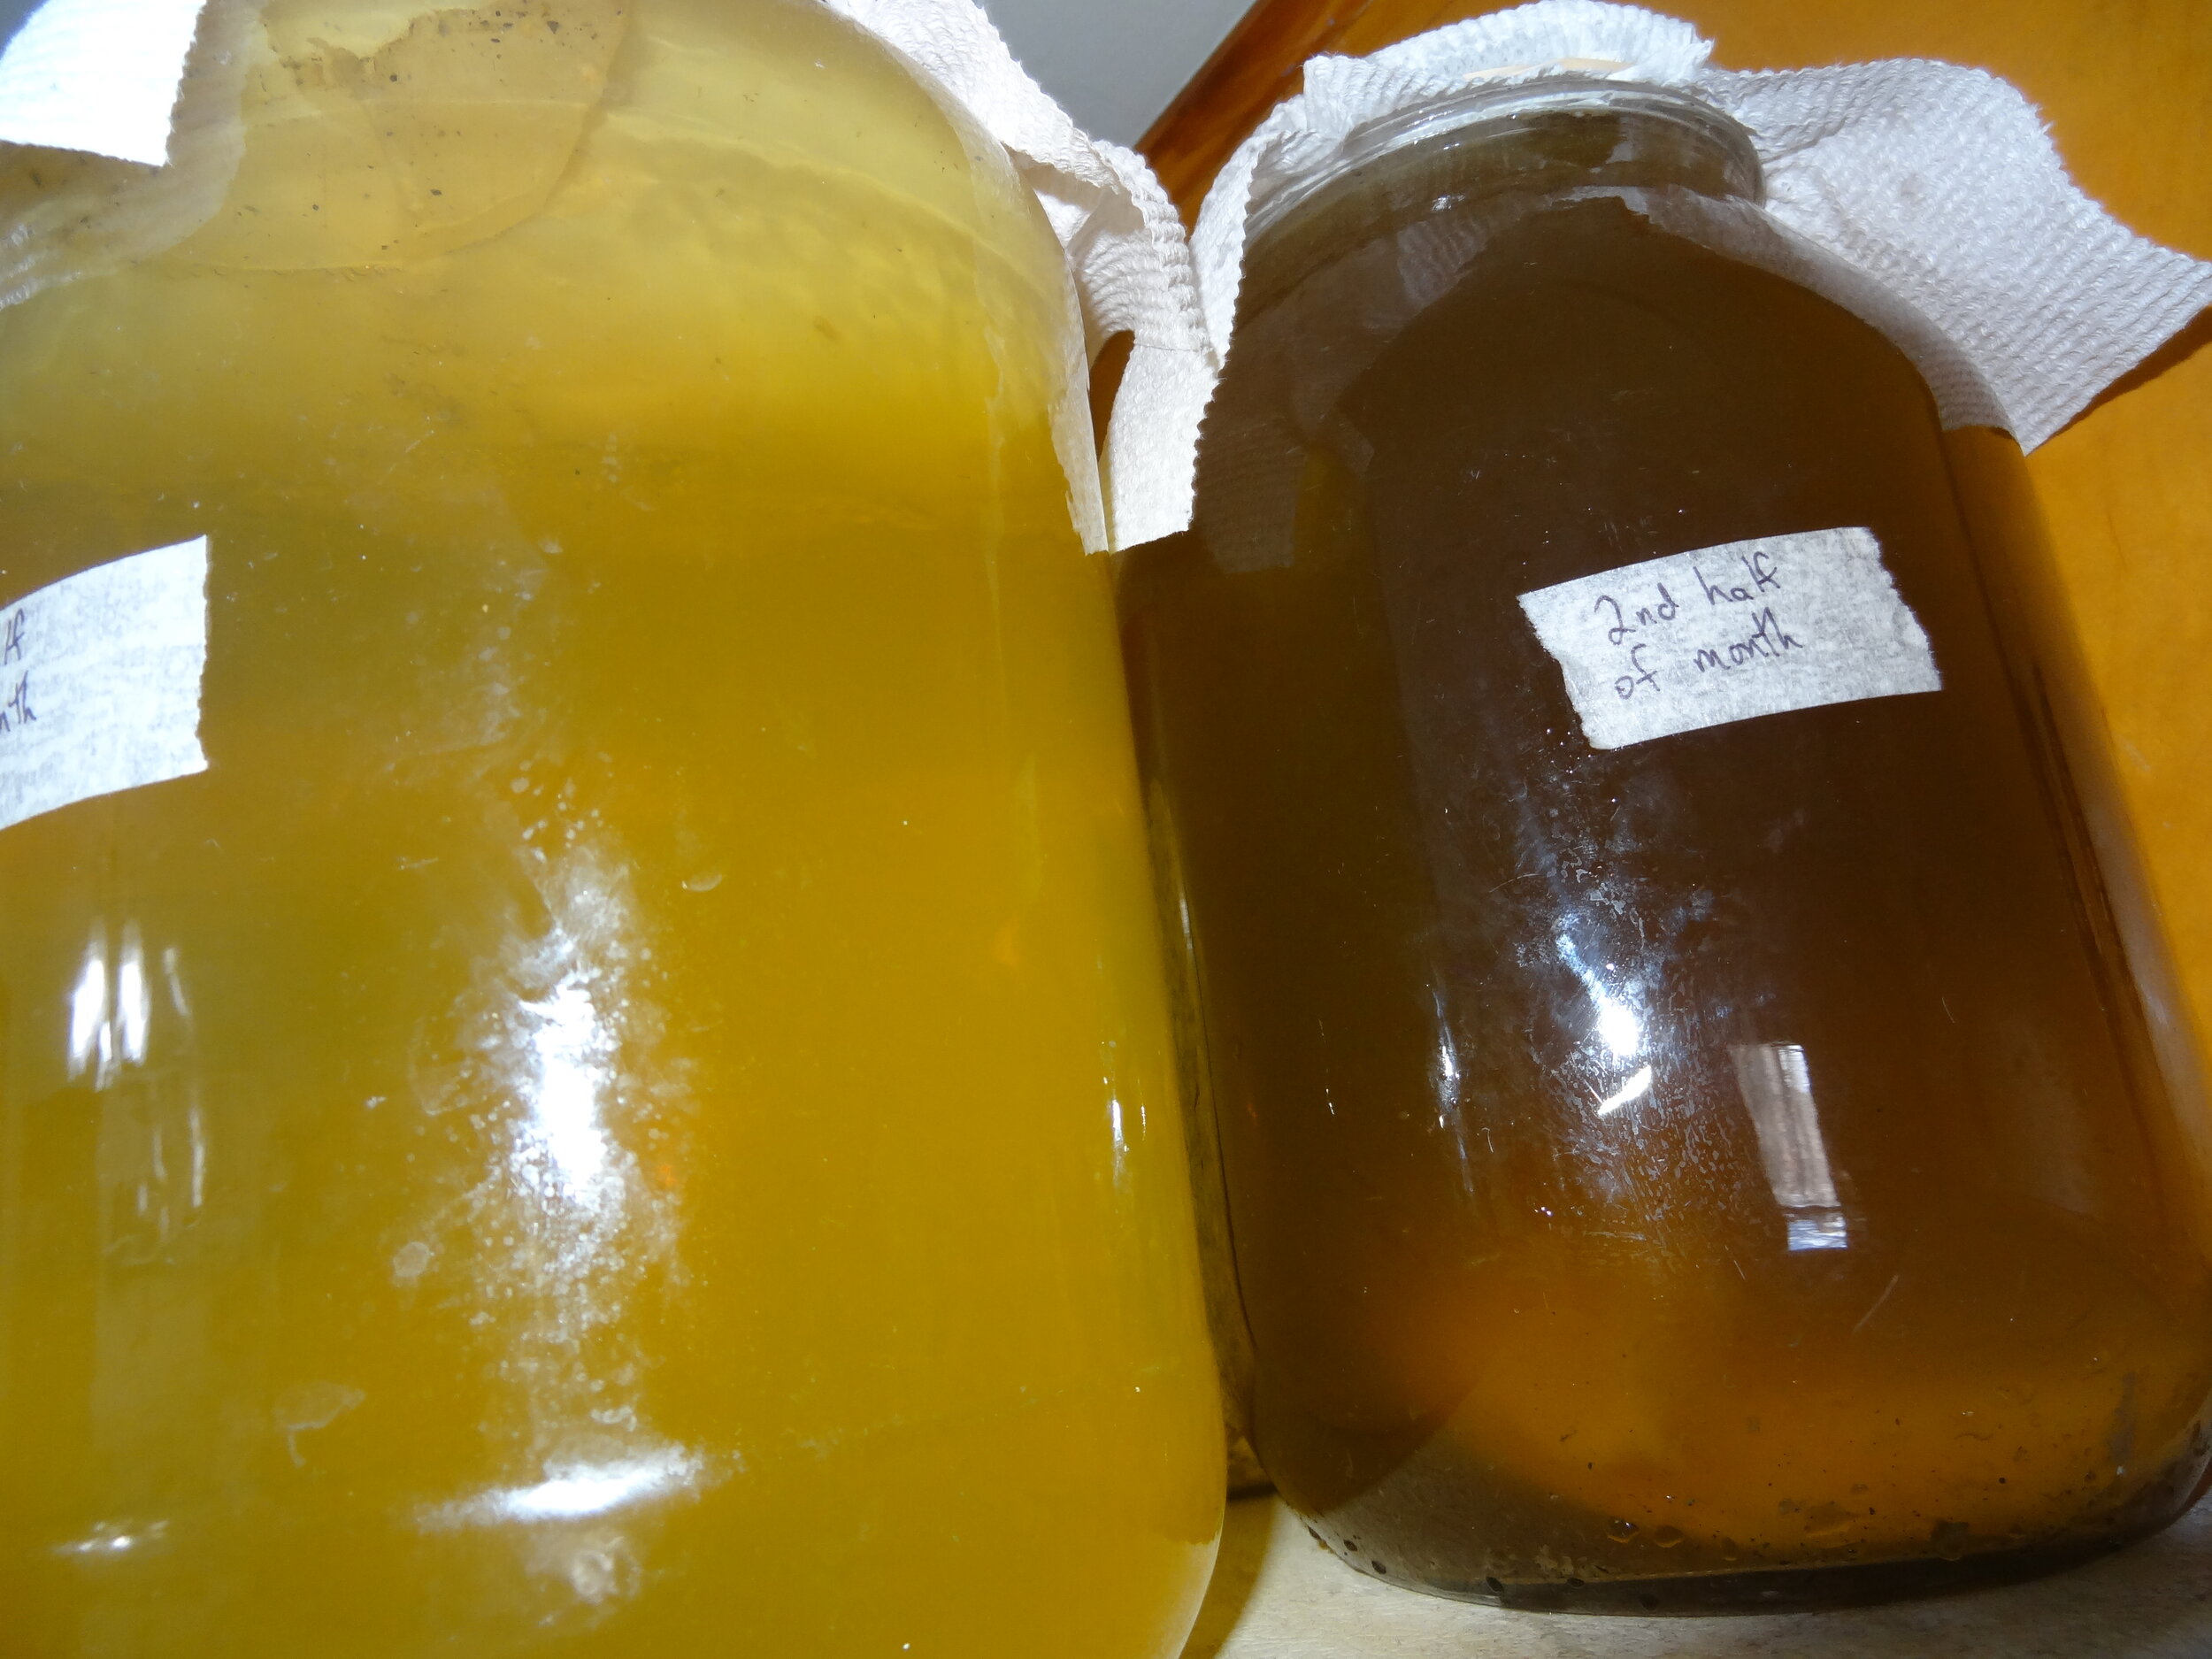
This photo shows how the kombucha changes color as it sets. The darker one I just got going this morning. The light colored one was started a couple weeks ago!
FAST FORWARD HOWEVER MANY DAYS YOU DECIDE TO LET YOUR KOMBUCHA FERMENT…
First, you’ll boil your water and make your sugar, green tea and hot water blend again. Let that cool.
I store my finished kombucha in quart jars but there are many options for you, including glass jars you have left from buying kombucha in the store or flip-top fermentation jars.
With very clean hands or a wooden spoon if you’re able to capture it with that, take the SCOBY out of the jar. Have fun observing it as it should have a little thin baby SCOBY attached to it now! Scoop out about 1 cup of kombucha from the top of the gallon jar (it has more bacteria in it than at the bottom) and set that and the SCOBY aside for now for your next batch.
I like to pour the kombucha through a fine-meshed strainer to catch those little wiggly squiggly things. For ease, just set the strainer into the funnel as you pour your kombucha into your jars.
Now you’ll dump your tea/sugar/water mix into your gallon jar again, fill nearly to the top with water, add the SCOBY and the cup of kombucha tea you saved back, fill the jar with water the rest of the way, cover and put back in your designated kombucha-brewing spot.
NOW COMES THE FUN PART!
You get to decide at this point if you like your kombucha as it is OR if you want to move on and do a 2nd ferment to get some fizz and flavor!
This is the point where I like to add 1 tea bag of any of the Celestial Seasonings fruit tea bags (see photo above) to each jar. Screw the lid on tightly and leave on the counter for at least 2 days and up to 4 days. But be careful! The longer it sets the more likely you are to have a kombu-splosion on your hands and all over your kitchen!

Basically, the longer you leave it out, the fizzier it gets. If you don’t want it fizzy but just want the flavor, you can just do the 2nd ferment for 24 hours and then refrigerate. This results in a fruit-punch-like-drink which our guests and children love.
There are hundreds of flavor options here so get your imagination going and have fun experimenting! Some people add fresh fruit, fruit purees or syrups, ginger, herbs….even rhubarb. I’m sure a simple search of flavorings for kombucha will get your creative juices flowing…
WHAT DO I DO WITH THE BABY ‘BUCHA?
Give it your friends!
Start a kombucha hotel…. (it’s a real thing but I’ve never done it)
Add it to your compost pile….
Feed it to the chickens….
I don’t separate the mama SCOBY and the baby SCOBY every time but you can if you like. I prefer to keep a few on hand for when a friend needs one.

I hope this opens a whole new world of ideas for you! If you have questions or would like to share about your kombucha experience, I’d be happy to hear from you!
~Cora
Helpful tip: Remember to keep a distance of 4-5 feet between ferments/culturing foods to avoid cross contamination.